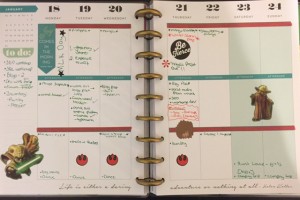
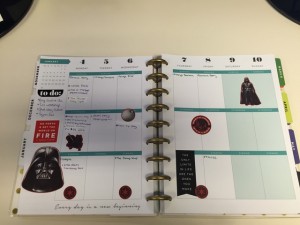
I’m now about 4 weeks into my new powerfully proficient planner plan for 2016 (how’s that for alliteration? 🙂 ) In my first Planner Tips post, I shared my initial tips on using my MAMBI Happy Planner- my planner of choice for running my writing and personal lives. With consistent use, I’ve fine-tuned some of my best practices with the Happy Planner. One of the things I like about this planner is the 3 sections, but I also admit that these blank sections be a bit intimidating when you first start using the planner. There are several examples and ideas floating around on how people use their’s but here is how I am currently using mine:
- Left hand Notes Section
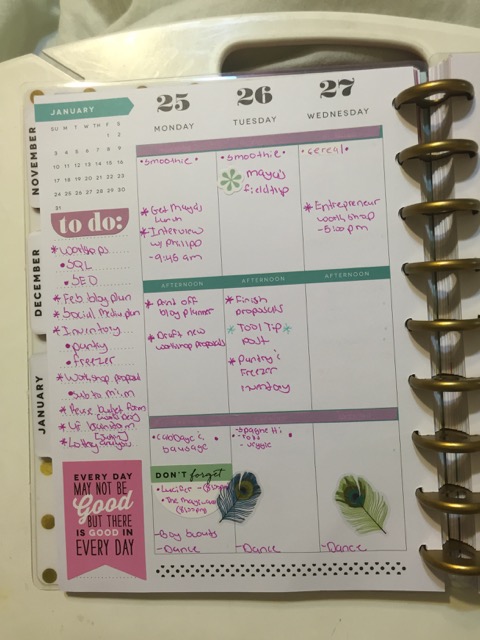
I use this section to list the things I want to do in a particular week. I tend to be a bit over eager and always list way too many items. 🙂 Due to the volume of tasks I usually list, and the fact that I have to maintain a certain level of fluidity in my schedule, it’s not feasible for me assign tasks to certain days for the entire week in advance. Instead, I use this notes section as a holding ground of sorts. I start the week off with a few assigned tasks on Monday and Tuesday and just go from there. As I finish tasks, I scratch them off my the master list and then schedule in additional tasks for other days in the week.
I’ve learned through trial and error, that the only place I need to actually scratch through items is the master list. I use symbols and marks on the actual day boxes to denote incomplete tasks, the need to reschedule something, etc. So far, this has really worked for me and has eliminated visual clutter by eliminating repetitive writing and having too many cross out marks.
- Section 1- Top Things for the Day
I use the top section to denote the most, important things/appointments/reminders/etc. for the day. I also use the space to jot down my breakfast plans for the day. Each morning I have to oversee getting myself and 3 kids ready to tackle the day, and my breakfast usually never crosses my mind. I look at this planner every morning and each night before I go to bed. The reminder to either fix my smoothie or pack up my cereal for transport to the office has been instrumental in me actually eating breakfast Monday-Friday.
- Section 2- Role Tasks
Whenever I plan out my goals & plans for a new year, I set them based on the primary roles I want to focus on for the year. For example, the roles of mother, writer, homeowner, “me”, and photographer are a few of the roles I’m focusing on for 2016. As such, each week I have tasks to do for each role in order to make progress on the goals I’ve set.
- Section 3- Home Life/Personal
I use the section to denote dinner plans, any activities the kids have going on, gym days (denoted here with the peacock feather stickers), hair washing days, chores & errands, and anything else that pops up in the home life/downtime category. This is also a good section to note tv programs. I’m constantly forgetting to set my DVR to record new shows or special programs that I want to watch, so sticking them here is a good reminder to either watch them live, or schedule the DVR (via an iphone app) to record them for later.
- The Weekend Boxes
I’m still playing around with a better use for the boxes for Saturday and Sunday. The weekends are a time for me to relax more, get in some social time, and to catch up on anything that slipped through the cracks from the week. I’m currently using the top & bottom sections the same way I use them throughout the week. I don’t list my meal plans because I’m a bit more spontaneous on the weekends.
Because I have a lot on my plate this year as far as my career, writing, photographer goes, I think I’ll use the middle boxes to keep track of the good things that happened during the week. It’s nice to see a bit of positivity during some trying weeks.
- Decor
I’m still embracing the less is more philosophy when it comes to decorating my planner. I can’t be productive with an overly cluttered planner. This includes the use of too many colored inks, too many stickers, messy handwriting, and cross out marks everywhere. I approach decorating my planner by first selecting my primary & secondary color inks for the week. I like to use the secondary color to cross off items from the master list and to use as the asterisk color on any tasks of special note. Just wait until I show you my monthly January layout. You’ll quickly understand my need for a consistent color palette. 🙂
I use stickers mostly to:
- Interject a bit of fun (and because Yoda is a bad ass)
- Denote gym days- I just select 3 stickers for this, it changes weekly
- Denote hair wash days (I LOVE the afros).
- Add in 1-2 motivational quotes per week
I think I’m developing a sticker preference for smaller, simple icon stickers that I can use denote activities and for special emphasis.
I’m not a huge washi tape fan, but i do like the group the top 2 sections together and the leave the 3rd section solo with a little washi boarder. For me, this helps me keep the “Business Areas” of my plan separate from the more personal/social section.
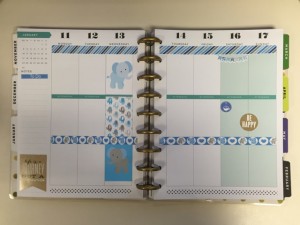
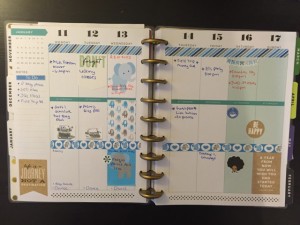
Here are some layouts from earlier in the month. You can see the progress in the first set from how it looks after initial decor to how it fills up through as the week progresses.
I found a pack of Star Wars stickers in the $1 Spot at Target, so they make for some fun weekly layouts.
