Today marks the first entry in my new “Tools and Tips” series! Being an avid planner for the past 17 years, I figured my first set of planner tips should revolve around my (mis)adventures with my new MAMBI Happy Planner and how I use it to keep me on track and accountable to my 2016 author and personal goals.
I’ve been using the Passion Planner the last 2 years for personal and professional organization, but as a creative being, I found myself wanting something more to keep me engaged in my writing and personal goals. Luckily, several of my author peeps are avid planner horders and I came across the Happy Planner. This planner provides a weekly layout I really, really like and lots of space to note tasks, events, and random bits of creativity. 🙂
Being the anal, perfectionist that I am, it was overwhelming to tackle a new planner. What if I mess it up, or use it wrong, or…. See, this is how my crazy mind works. 🙂 So I hit the internet to see how others were using their planners. Since the primary focus of this planner is to track my personal and author roles, the videos I found didn’t exactly cover all the angles I needed. So I brainstormed a list of possible uses for my Happy Planner and I will implement and tweak these until I come up on the best use and practices that work for me.

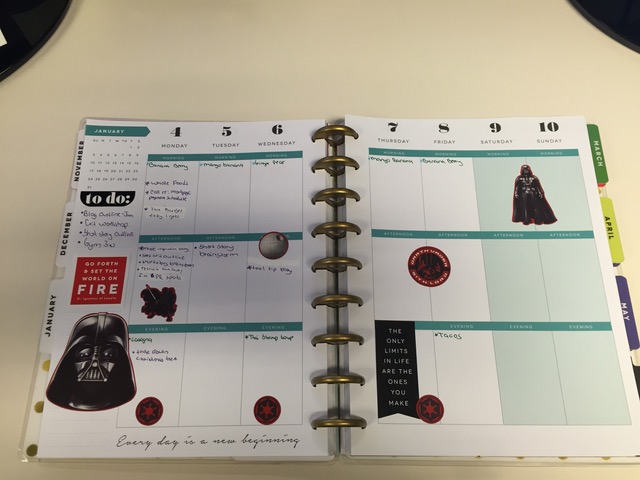
And without further ado, here is my very first week spread!
Since this is was for the very first week of 2016 and I was fresh off of a one week, intensive goal planning spree, I felt a little bit of the dark side of the Force would be needed to hit the ground running and incorporate several new routines into my life. (gym, gah!) This is my planner after a little bit of decoration and my initial notes for the week. I need plenty of white space to avoid visual clutter and for flexibility to add items as my week progresses, so I won’t decorate as much as some others do.
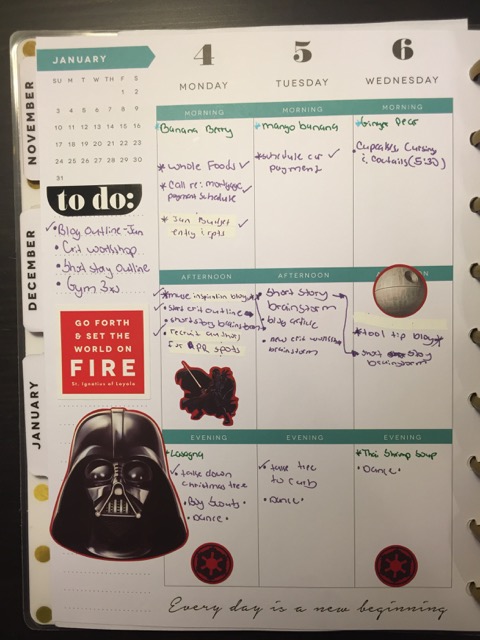
For now, I use the left hand side to note the major tasks I need to complete for the week. In order to keep me focused on my overall mission, these items are all attached to a specific role (more on those later) I want to focus on in 2016. Since there is only so much I can plan for an entire week when I sit down on Sundays, I’ve learned to be flexible when it comes to actually accomplishing my set tasks. Seeing all I need do that week listed on left works for now. As I traverse the week, I pencil them in as I see fit.
I’m currently using the daily columns to track my meal plans, appointments, key reminders, and my writing tasks. I’m still on the fence as to how to best use the 3 boxes per day, so for now the top box is for important reminders, appointments, and that day’s breakfast smoothie. (I may move to a Big 3 focus for this box in the future.) The middle box is being used to note my writing and author related tasks. I use the last box for my household, mom, and “me” roles, such as dinner plans, family activity reminders, etc. The 3 red star stickers are both visual interests and denote my gym days this week.
As of right now, I have no idea how to best use the weekend boxes since I tend to go “off grid” on Saturdays and Sundays. And since I do love motivational quotes, I like to randomly pepper in a few each week to provide a bit of uplift.
Here’s an updated shot of my planner a little later in the week. Each morning I take a glance at it and determine all I need to do and what activities I want to do that day. Knowing me and my propensity to take on too much, I try to limit the top box to the 3 major items I need to keep in mind for the day. I also think I need to limit the number of tasks in the middle box, but for now it helps to see them even if I don’t manage to accomplish them all that day. It’s simple enough to move them to another day later in the week (as you can see by my many arrows-lol)
So, here are this week’s big wins:
- Using the left hand side first to list out the week’s most important tasks
- Using the top box for my main priorities for the day
- Easy to look at–not going overboard on colors and decor
Here are the areas I plan to tweak:
- Better use of the middle box
- Neater penmanship (it’s a struggle)
- Brainstorming more ways to bring in additional role functions weekly
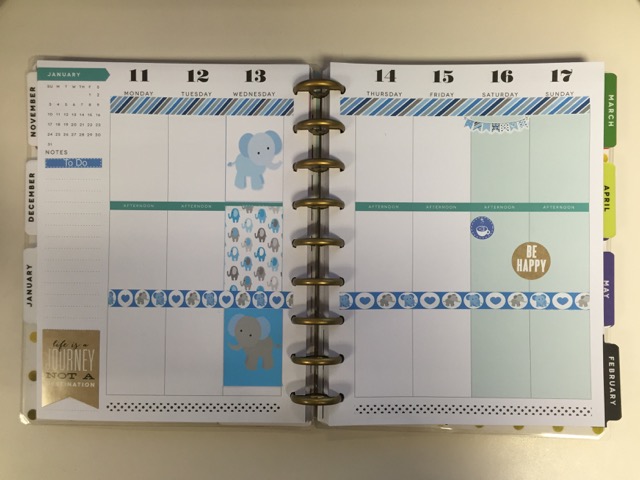
So this ends my week one recap on the Happy Planner weekly layout. I’ve made a few adjustments in my weekly spread which, I’ll share next next week before I dive into my monthly planning tips. In the meantime, here’s a sneak peek at this week’s planner theme before I started writing in it. You just gotta love those cute elephants! 😉


Tomiko
I’m so not organized!! I need to do this
Laura Wize
Great tips. I am actively working on my planner now it is really helping with blogging and creating content!
Kara
I invested in the Happy Planner as well and I’m loving it. I love the saying at the bottom of your page, I think I will incorporate things like that from time to time.